Picture House #3

Click here
to see the introduction.
Phase 1 : Early 2004 : Planning
This is a diary of the construction of 'the official AV Forums home cinema'.
I have tried to stick to a modest budget while compromising as little as possible. The cost of the construction work, fixtures and fittings has come to around £10,000. The cost of the home cinema kit is not really relevant since anyone reading this will install equipment suitable to their own tastes and budget. Suffice it to say that if you are interested in building a dedicated home cinema room and the opportunity to do it from the raw brickwork up, then this, I hope, will serve as a useful guide.
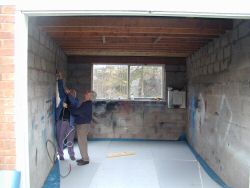
| Before |
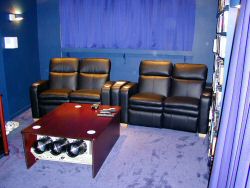
After |
 |
 |
Since I'd be converting a detached
garage, I knew from the start that there would need to be
some emphasis on making the room welcomingly warm even during
the coldest weeks of our winters. Who wants to sit in a freezing
room to watch a movie?
So the instructions given to
the builders were that the room would need to be easy to heat.
To that end, it was decided that we'd need a new concrete
floor with insulation beneath. Insulation would also need
to be placed between the batons behind the plasterboard walls
and also in the roof.
With regard to decoration, my
initial intention was to decorate the room in a very dark
blue colour scheme. Since we have lots of original movie posters,
I wanted to feature these on the walls. Framing the posters
behind glass and mounting on the walls would mean they would
both reflect light and sound when watching movies. So the
intention was to locate the posters behind the screen at the
front and behind curtains on the side walls. The curtains
could be opened when not watching a movie to reveal the posters.
And when closed their uneven surface would help dissipate
the sound to help reduce ambience.
In Picture house # 2 the CRT
projector was located on the ceiling and projected onto an
8 foot wide screen.
I was persuaded by several people
more knowleagable than me that the best solution would be
to locate the projector on the floor with a coffee table built
around it. This would mean that the airflow through the projector
(vital for cooling) could be directed along the floor and
would therefore be quieter than if the projector were directly
above our heads. Also I was advised that a 7 foot wide screen
would produce the best image quality rather than something
bigger. I'd be a fool not to take the advice of these experts.
Since a 7.1 sound system is required
I would need the speaker cable plumbed into the walls early
on. Finding the correct location of the subwoofer to produce
the best results can be a tricky job. To allow for the maximum
flexibility here I was advised to have an LFE cable be available
at all four corners of the room.
At this point in time it became
clear that having loft space where we could locate and arrange
cabling and electrics would be an invaluable advantage. For
example we could locate the alarm control panel here and just
have the alarm keypad on the wall near the door in the room
below.
| |
| This view of the garage as seen from
the house. |
« Introduction | Phase 2 : Construction
» |


